How to Attach a Juba Tongue Port
An Illustrated Guided to Attaching a Tongue Port to Your Pony's Bit
Written by cPony on
Last updated on
A rubber bit port (also called a juba tongue port) is a $2 (to up to $10 now, depending on where you shop) piece of molded rubber that attaches to your pony's bit. Its purpose is to hold the pony's tongue down and prevent him getting his tongue over the bit. Below is step by step guide with photos illustrating how to attach it to a simple rubber bit (I use a straight mouth rubber snaffle in this tutorial). Feel free to start at the end to view a short video of me attaching a rubber bit port to bit gag.
Before we start here is the overall idea of what we are going to do:
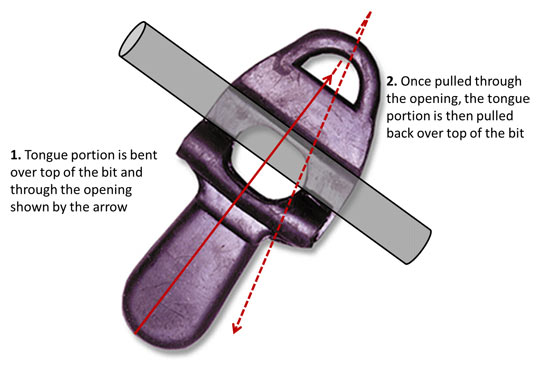
Overall diagram illustrating how we will attach the bit port in three rough stages (see video at the bottom of the page if that is easier). Diagram by cpony - ©2011
Now that you have a general idea of how the juba port will attach to the bit, let's get started:
- Align the Bit and Bit Port
Start by placing the bit on a level surface. If possible, try to stand the bit on its rings as shown below. Position the bit port with the long portion (the part that will sit on top of the pony's tongue) facing away from the bit.
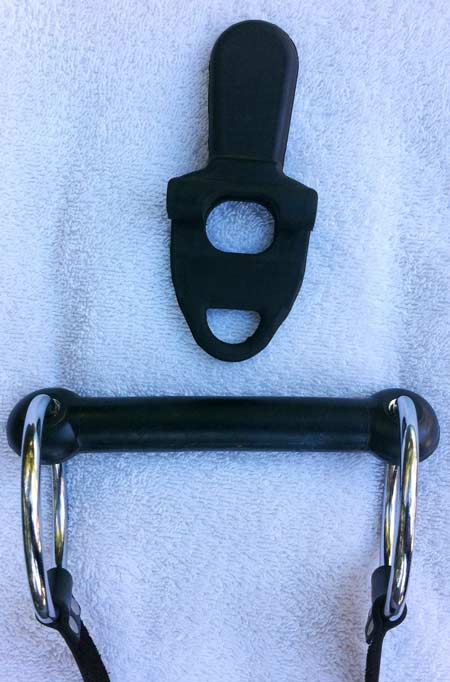
Step 1. Photo by cpony.
- Slide the Bit Port Against the Mouthpiece of the Bit
Pull the bit port against the bit. The side of the bit port you aligned in the previous step is grooved. You will slide the mouthpiece of the bit into this groove. Thus, the side of the bit port with the two holes (bottom) should now be under the mouthpiece. The other side of the bit port (top) should be on top of the bit as shown below.
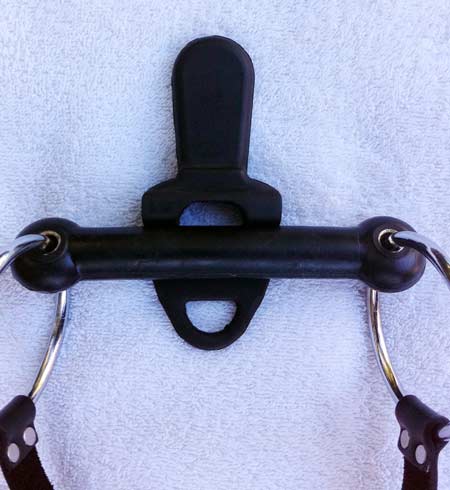
Step 2. Photo by cpony.
- Confirm Positioning of the Bit Port with the Bit
The photo below shows a close-up of the bit port against the bit mouthpiece. Notice that the side of the bit port with holes is under the bit.
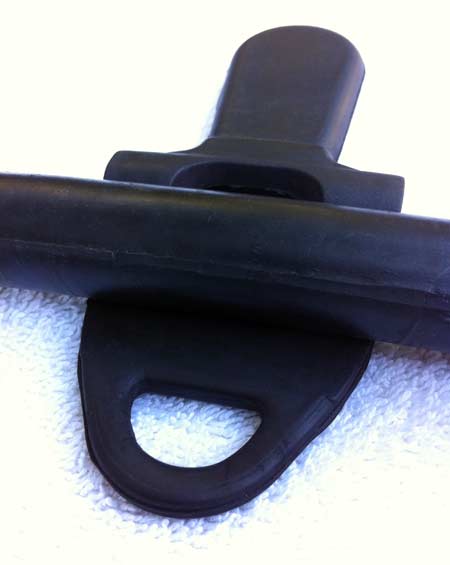
Step 3. Photo by cpony.
- Wrap the Bit Port "Arms" Around the Bit
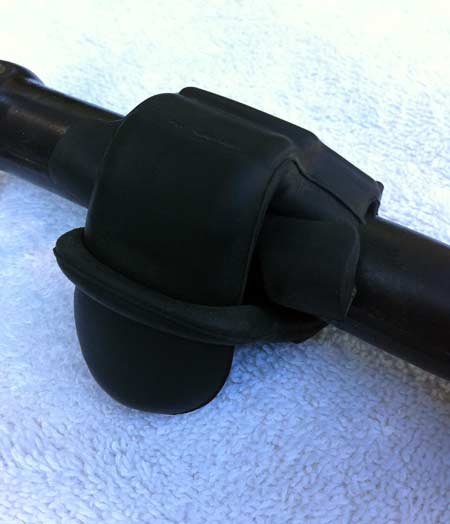
Now press the mouthpiece of the bit firmly into the groove of the rubber bit port. You will have to press it firmly enough that the little "arms" of the bit port wrap around the mouthpiece of the bit as shown in the photo below. The arms should be on the top of the bit, while the side of the bit port with the two holes should be on the bottom of the bit.

Step 4. Photo by cpony.
- Pull the Tongue of the Bit Port Over the Bit and Through the Hole
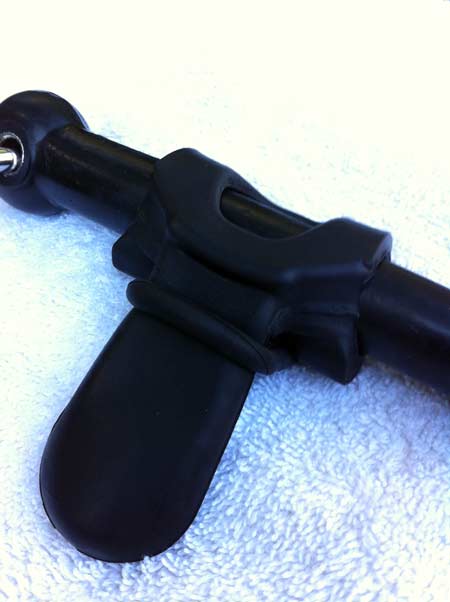
You want to pull the tongue (long portion) of the bit port over top of the bit and through the first hole of the bit port (which should be under the bit). This part is a little tricky because it is a tight fit. The way I do it is I hold the bit port against the bit with my left hand, and hold the hole of the bit port with my right hand. I then use my left thumb to push the tongue portion of over the bit and into the hole.
Step 5. Photo by cpony.
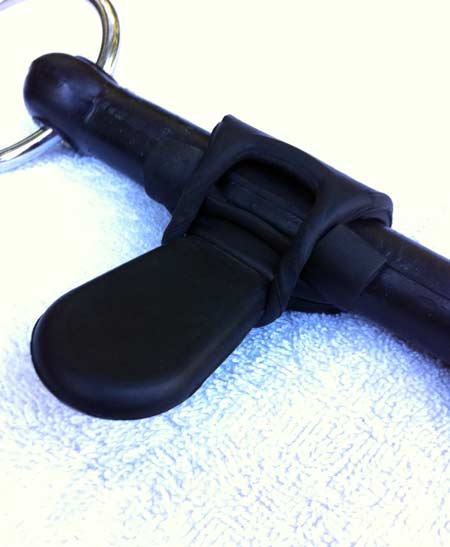
- Pull the Tongue Portion All the Way Through
Once you have threaded the tongue portion partway through the opposite hole, just pull the rest of the tongue portion through - this should be easy. After you have pulled it all the way through, there is a little piece of rubber (the far end of the bottom portion of the bit port) that should snap into a groove at the end of the tongue portion closest to the bit mouthpiece. Once that snaps in place, you are done.
Step 6. Photo by cpony.
- Done!
You are now done. Flip the bit over to see your handiwork. When putting it into your ponies mouth, you will want the flat portion facing up (towards the roof of your pony's mouth). The other side has a slight curve downwards to help hold the pony's tongue down (in the photo above you can see this). The photo below shows the bit port with the top up (i.e. the side of the bit port you see in the photo below is the side you want facing the roof of your pony's mouth).
Step 7. Photo by cpony.
Additional Notes and Where to Buy
WC Equestrian sells rubber bit ports (as do a few other equestrian retailers and Amazon, but shop around for ones that seem decent quality as I've been noticing some quality issues1 lately with nearly every retailer I've order from recently suggesting it's the manufacturer. You will probably pay more for shipping than the juba tongue port itself, so you may be better off buying from a local tack shop.You should hopefully now be able to attach a juba tongue port to your pony's bit. The attachment procedure is most difficult for thicker bits (such as the rubber straight mouth snaffle used in this example). If you have a bit with a thinner mouthpiece (e.g. some driving bits), you should have no difficulties.
Video Summary of Attachment Steps
Here's a video of me attaching a rubber bit port to a silicone bit gag I picked up in a fetish shop. Similar to most straightmouth rubber snaffles, it will be a tighter fit compared to a bit with a thinner, metal, mouthpiece. Neverthess, it can be done (you can see the immense drooling a bit gag with rubber bit port causes - very humiliating indeed!):Attaching a rubber bit port to a bit gag (or rubber snaffle): Here's a quick video illustrating the technique reuired to attach a bit port to a horse bit gag. It tends to require a bit of force near the end, but due to the lower quality of materials being used these days, the additional force will sometimes cause the rubber to break. There is little that can be done except purchase a new one until we can find a more reputable manufacturer who uses higher quality materials and a more reputible supplier who stores the rubber items properly to prevent them becoming brittle. If the video isn't displaying properly, you can try the direct link. The video of me attaching a rubber bit port to a bit gag is available in 720p.
Footnotes
Indeed, I have had several bit ports break while I was in the process of attaching them to the bit, rendering them absolutely useless and worthless. I warn you about this because it may take you up to 5-7 bit ports breaking before you find one of good enough quality due to chance alone. I'm not trying to discourage you, just warn you so you are no unsurprised should it happen and you are not unprepared (i.e. you only purchased one and now have to drive back to the tack store or wait a couple more days for a new order to arrive). If I find a new supplier of bit ports whose quality is higher (or seems to at least have quality control), I'll update this note, so you can switch to a reliable supplier/manufacturer.